The outside of your home is very important for how long it lasts and how it looks. Have you thought about using the best siding option, like Hardie Board siding, for your home? This type of siding is becoming one of the popular types of siding and might be just what you need for efficient installations. In this DIY guide, we will look at the benefits of Hardie Board siding. We will also discuss how to install it and guide you throughout the entire process of taking care of it to make sure it lasts a long time. Get ready to change the look of your home’s exterior!
- Fiber cement is very fire-resistant. It lasts a long time and looks great when painted.
- You need to install boards safely. Use house wrap and follow trim details for a nice finish.
- Keep it looking good by cleaning it regularly. You should also paint and caulk it to keep it safe from harm.
New Siding Installation Seattle WA
Fiber cement is a popular option for homeowners. It offers durability and a nice look for the outside of a home. Many people choose it instead of vinyl siding or synthetic stucco. James Hardie is the top maker of fiber cement products, using quality materials in their construction, including Hardie Plank Cedarmill siding.
What is Fiber Cement?
Fiber cement is a strong building material made from cement, water, sand, and cellulose fibers. James Hardie provides several styles of fiber cement products.
- Shingle
- Vertical
- Panels
- Trim
- Soffit panel
James Hardie fiber cement, which is often called James Hardie siding, is very popular with homeowners across North America. This is because of the quality and strong reputation of the James Hardie brand. It is built to handle tough weather like extreme weather, hurricanes, hailstorms, blizzards, and heavy rain.

One of the biggest benefits of fiber cement siding is that it lasts a long time. When you hire professional installers to install and care for James Hardie fiber cement siding correctly, it can last as long as 50 years. This siding is eco-friendly, very durable and provides great fire resistance, contributing to customer satisfaction. It helps stop the spread of fire, protecting your home.
Fiber cement siding is tough against rot and bugs. It doesn’t catch fire easily and is simple to paint. This makes it a popular choice for many siding materials. Plus, if you install James Hardie fiber cement siding yourself, you can save a lot on labor costs.
Preparing for Hardie Board Siding Installation Seattle Expert Tips
Before starting the installation, you must get the area ready for your new Hardie Board siding. First, remove the old siding. Next, caulk and flash around the windows and doors. Don’t forget to trim the sheathing.
- the right tools
- the job
- the materials
- for the job
- A workbench
- A circular saw or miter saw
- A dust collector
- A siding gauge
- A fiber cement circular saw blade
- A siding nailer
- A 15 gauge trim nailer
Safety is very important when working with fiber cement. Before you start, be sure to wear the right protective gear. This includes safety glasses, cut-resistant gloves, and a respirator. You need these items when you are cutting and drilling the sheets.
- Use wet cutting and drilling.
- Use dust extraction equipment.
- This will help control dust.
- It will also reduce the risk of breathing problems like silicosis.
Once you have your tools and protective gear, it’s time to check and get the area ready for new siding installation. First, remove any nails or staples from the current home exterior to prepare for the renovations, ensuring complete satisfaction in the process. After that, you can install your James Hardie fiber cement with a price match guarantee. When you change old siding, make sure to wear a mask, gloves, and a long sleeve shirt. Some old materials might have lead paint, which is harmful.
Installing Hardie Board Siding: Step-by-Step Guide

Now that you have prepared your area and taken safety measures, it’s time to start the installation.
- Putting on house wrap
- Marking the studs
- Measuring and cutting the panels
- Installing the siding courses
- Putting on the corner trim
First, you need to put house wrap on your home. This helps stop water from getting in and keeps your house safe from moisture. After the house wrap is up, use a stud finder. This tool helps you find and mark the studs on your wall. It is important for getting the nails in the right spot and for supporting your panels well.
By breaking your text into smaller paragraphs, you can make it simpler to read and understand. This article is really good.
Next, measure your panels. Cut them to size with a circular saw or a miter saw. Use a diamond blade that is meant for cutting fiber cement. Make sure to wear a dust mask. Follow safety steps while cutting the panels.
To install boards around windows and doors, do these steps:
- Measure from the chalk line to the top of the siding.
- Add 1/8 inch to this measurement.
- Cut the boards to fit, leaving a 1/8-inch gap between the boards and the window trim and sill.
With your panels cut, it’s time to put them up. Start by placing the first row of boards, making sure the panels are straight and lined up. When you add each next row, stagger the joints. This will help make the finish look nice and professional.
- Make sure to follow the nailing guidelines for fiber cement products.
- This will help you get a strong and lasting installation.
Hardie Board Siding Seattle Perfecting Trim and Corner Details
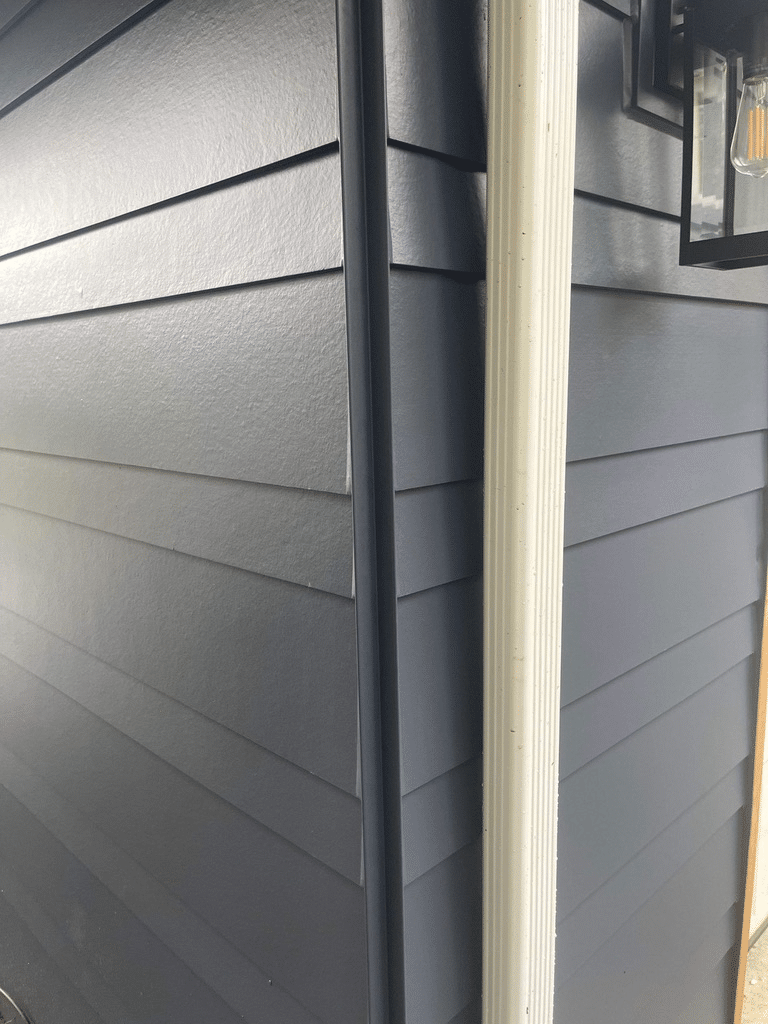
A clean look happens when you install trim and corner details correctly. In this part, we will talk about how to put in window and door trim. We will also cover corner trim, so you get a smooth and polished finish.
Installing trim around windows and doors makes your exteior look better and gives it a neat, finished look. To put on window and door trim, start by attaching a Hardie Tab to the back of the pre-cut Hardie Trim board. Make sure the tab sticks out one inch past the trim’s edge. Then, use stainless steel finish nails to secure the trim.
- Remember to use caulk around windows, doors, eaves, and trim edges.
- This will help stop moisture from getting into the wall cavity.
Corner trim helps make a smooth change between panels. To install corner trim, do these steps:
- Place one board flat against the corner of the house.
- Lay another board over it at the other corner.
- This makes a smooth and nice-looking change between the panels, giving the final look to your home exterior.
Installing corner trim is an easy task. You can do it in just a few steps. Start by following these instructions.
Siding Installers Seattle KV construction On Avoiding Common Mistakes
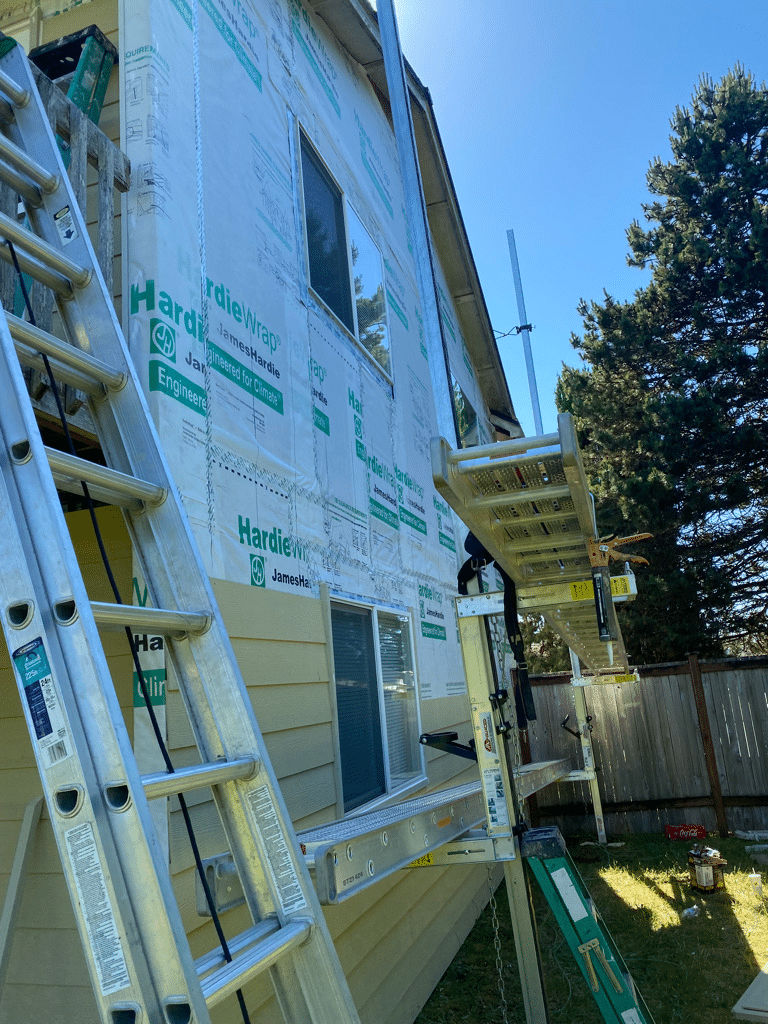
To make sure installation goes well, you need to know about typical mistakes and how to prevent them. This part will look at wrong nailing methods and bad clearances, along with their possible effects and ways to fix them. Using incorrect nailing techniques can cause the siding not to stick properly to the wall. This can happen from using the wrong nails or not using trim nails correctly.
Proper nailing techniques are very important for a good Hardie Board installation. You should use stainless steel or hot-dipped galvanized nails. Make sure to put them in at the right depth and distance apart. This will help secure the planks to the studs. For HardiePlank blind nailing is the best method to use.
It is important to keep enough space between boards and other surfaces to avoid water damage and wear. James Hardie recommends a 6-inch space from the ground for Hardie board. Make sure to follow these rules and keep the right clearances around windows, doors, and other areas to protect your home’s exterior.
Tips for Maintaining Your Hardie Board Siding
After your Hardie Board siding is put up, taking care of it is important. This helps it stay looking good and last longer.
The first step in caring for your exterior is cleaning it. A soft brush works well for this task.
To keep your boards looking good, wash the outside surfaces every 6 to 12 months with a garden hose. This will help get rid of dirt and debris. Use a gentle, biodegradable soap along with a soft brush or cloth for cleaning. Do not use power washers, acid, or high-pressure washing because they can harm the fiber cement surface.
Seattle Fiber Cement Siding Installation Summary by KV construction:
In conclusion, it is a great option for homeowners who want something strong, nice-looking, and easy to take care of. If you follow the steps in this DIY guide from KV construction LLC, you can install and keep your Hardie Board in good shape. This will help protect your home’s exterior and keep it looking good for many years. Many homeowners agree that KV construction LLC did a great job with their installations.
Frequently Asked Questions
Do you nail or screw Hardie board?
When you install Hardie board, it’s best to use stainless steel or hot-dipped galvanized nails. You can either hand nail or use a pneumatic nailer. For the best results, you should use blind nailing at the top. At the bottom, use face nailing. This will help keep the fasteners hidden properly.
Can you install Hardie board yourself?
It is not a good idea to try to install Hardie board on your own. This work usually needs a group of contractors. It is not meant for just one person to do.
What goes under HardiePlank siding?
These boards need to be put up on strong wood or steel studs. These studs should be no more than 24 inches apart. You can also install it directly on at least 7/16-inch thick OSB sheathing.
You can make your own starter strip for it. Or, you can buy a ready-made starter strip from another company.
Do you nail the bottom of Hardie siding?
For Hardie, it is best to use stainless steel or hot-dipped galvanized nails. You should nail by hand or with a pneumatic nailer. Use face nailing at the bottom and blind nailing at the top.
What type of nails should I use for Hardie Board siding?
For the best results, it is a good idea to use stainless steel or hot-dipped galvanized nails for Hardie Board.
